wgpu
创建 buffer, 并指定 buffer 的格式, 如下: UNIFORM 格式
#![allow(unused)]
fn main() {
let uniform_buffer = device.create_buffer_init(&wgpu::util::BufferInitDescriptor {
    label: Some("egui_uniform_buffer"),
    contents: bytemuck::cast_slice(&[UniformBuffer {
        screen_size: [0.0, 0.0],
    }]),
    usage: wgpu::BufferUsages::UNIFORM | wgpu::BufferUsages::COPY_DST,
});
}
写 buffer 数据
#![allow(unused)]
fn main() {
self.queue.write_buffer(&self.uniform_buffer.buffer, 0, data);
}
绑定组, 是为了把 Buffer 与 Shader 关联.
如下: 定义了 一个 绑定组布局, 用于 表明 Buffer 的用处, 此处用在 Uniform格式
#![allow(unused)]
fn main() {
let uniform_bind_group_layout =
    device.create_bind_group_layout(&wgpu::BindGroupLayoutDescriptor {
        label: Some("egui_uniform_bind_group_layout"),
        entries: &[wgpu::BindGroupLayoutEntry {
            binding: 0,
            visibility: wgpu::ShaderStages::VERTEX,
            ty: wgpu::BindingType::Buffer {
                has_dynamic_offset: false,
                min_binding_size: None,
                ty: wgpu::BufferBindingType::Uniform,
            },
            count: None,
        }],
    });

let uniform_bind_group = device.create_bind_group(&wgpu::BindGroupDescriptor {
    label: Some("egui_uniform_bind_group"),
    layout: &uniform_bind_group_layout,
    entries: &[wgpu::BindGroupEntry {
        binding: 0,
        resource: wgpu::BindingResource::Buffer(wgpu::BufferBinding {
            buffer: &uniform_buffer.buffer,
            offset: 0,
            size: None,
        }),
    }],
});
}
[[group(0), binding(0)]] var<uniform> r_locals: Locals;
创建 渲染管道布局 时, 会设置 绑定组布局
#![allow(unused)]
fn main() {
let render_pipeline_layout =
    device.create_pipeline_layout(&wgpu::PipelineLayoutDescriptor {
        label: Some("Render Pipeline Layout"),
        bind_group_layouts: &[&uniform_bind_group_layout, &texture_bind_group_layout],
        push_constant_ranges: &[],
    });
}
在创建渲染管道时, 指定的 vertex 或 fragment 的 buffers, 会 作为输入参数, 传递到 shader 的 入口函数
vertex 的 step_mode 参数用于决定 顶点Buffer 是如何移动的
当设置为: VertexStepMode::Instance 时, ``` render_pass.draw(0..4, 0..self.font_instance_num); ``` 表示:
    每一个 font_instance 增加时, vertex_buffer 向前移动一个单位, 相同的vertex 会遍历4次(``` builtin(vertex_index) ``` 就是 从0开始依次到3)

当设置为: VertexStepMode::Vertex 时, 。。。
fragment 的 blend 参数用于决定 fragment shader如何处理采样Color
当为 wgpu::BlendState::REPLACE 时, 整个输出成单色?
当为 wgpu::BlendState::ALPHA_BLENDING 时, 可以通过 fragment shader 控制输出?
#![allow(unused)]
fn main() {
let render_pipeline = device.create_render_pipeline(&wgpu::RenderPipelineDescriptor {
    label: Some("Render Pipeline"),
    layout: Some(&render_pipeline_layout),
    vertex: wgpu::VertexState {
        module: &shader,
        entry_point: "vs_main",
        buffers: &[wgpu::VertexBufferLayout {
            array_stride: std::mem::size_of::<Vertex>() as wgpu::BufferAddress,
            step_mode: wgpu::VertexStepMode::Vertex,
            attributes: &wgpu::vertex_attr_array![0 => Float32x2, 1 => Float32x2, 2 => Uint32],
        }],
    },
    fragment: Some(wgpu::FragmentState {
        module: &shader,
        entry_point: "fs_main",
        targets: &[wgpu::ColorTargetState {
            format: config.format,
            blend: Some(wgpu::BlendState::REPLACE),
            write_mask: wgpu::ColorWrites::ALL,
        }],
    }),
    // ...
});
}
当创建 pipeline 时, 指定 基本形状 primitive 时, wgpu::FrontFace::Ccw 表示如果顶点是逆时针 则三角形朝前, 否则 朝后.
CullMode::Back 表示 切除朝后的 三角形
#![allow(unused)]
fn main() {
primitive: wgpu::PrimitiveState {
    topology: wgpu::PrimitiveTopology::TriangleList,
    strip_index_format: None,
    front_face: wgpu::FrontFace::Ccw,
    cull_mode: Some(wgpu::Face::Back),
    ...
}
}
[[stage(vertex)]]
fn vs_main(
[[location(0)]] a_pos: vec2<f32>,
[[location(1)]] a_tex_coord: vec2<f32>,
[[location(2)]] a_color: u32,
) -> VertexOutput {
}
[[stage(vertex)]]
fn vs_conv_main(
[[location(0)]] a_pos: vec2<f32>,
[[location(1)]] a_tex_coord: vec2<f32>,
[[location(2)]] a_color: u32,
) -> VertexOutput {
}
创建的 bind_group 会定义 buffer 的数据信息,
#![allow(unused)]
fn main() {
let uniform_bind_group = device.create_bind_group(&wgpu::BindGroupDescriptor {
    label: Some("egui_uniform_bind_group"),
    layout: &uniform_bind_group_layout,
    entries: &[wgpu::BindGroupEntry {
        binding: 0,
        resource: wgpu::BindingResource::Buffer(wgpu::BufferBinding {
            buffer: &uniform_buffer.buffer,
            offset: 0,
            size: None,
        }),
    }],
});
}
在 wgsl 中 引用 bind_group buffer 数据
[[group(0), binding(0)]] var<uniform> r_locals: Locals;
更新数据 到 wgsl的buffer 中,
#![allow(unused)]
fn main() {
self.queue.write_buffer(&self.uniform_buffer.buffer, 0, data);
}
配置 render_pass, 使之 开始渲染
#![allow(unused)]
fn main() {
render_pass.set_bind_group(0, &self.uniform_bind_group, &[]);
}
wgsl 坐标系
顶点坐标系
正中心是 (0,0), x 和 y 的范围是 (-1, 1)
(-1,1) (0,1) (1,1) . . (-1,0) (0,0) (1,0) . . (-1,1) (0,1) (1,1)
纹理坐标系
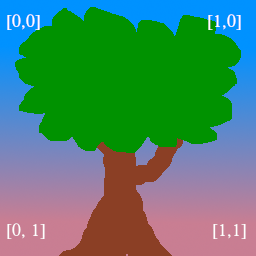
纹理的绘制
[[group(0), binding(0)]] var t_diffuse: texture_2d<f32>; [[group(0), binding(1)]] var s_diffuse: sampler;
图片数据会被加载到 Texture 中, 设置到 Bind Group 中, 在 Shader 中, 会在上面的代码中被截获, 最后会在 [[stage(fragment)]] 中 使用 textureSample(t_diffuse, s_diffuse, in.tex_coor) 根据输入的纹理坐标 对纹理采样, 由于每一个顶点 会处理 fragment, 每一个 vertex坐标 对应一个 texture坐标, 如果 texture坐标 是 铺满 (0.0, 0.0) 到 (1.0, 1.0) 则图像上铺的纹理是完整的.
wsgl 其它细节
@builtin(position) 表示顶点的输出位置, 如果想要看到点 就必须设置, 否则什么也没有
@builtin(vertex_index) 当 执行 render_pass.draw(0..3, 0..1); 时, vertex_index 被设置额 3 次, 依次是 0,1,2
[[builtin(instance_index)]] instance_idx: u32 执行 render_pass.draw(0..3, 0..1) 时 的第二个参数
out.clip_position = vec4<f32>(model.position, 1.0); 在 shader 中, wgpu中 位置 和 颜色 一般用 4D向量 表示
fragment 的 shader, 返回值表示 顶点颜色
[[stage(fragment)]]
fn fs_main(in: VertexOutput) -> [[location(0)]] vec4<f32> {
    return textureSample(t_diffuse, s_diffuse, in.tex_coords);
}